
Hey everyone today we are going to learn How to Make a Budget App in React JS from scratch. Making a budget app is usually a nice and sensible bet, especially if you study React JS. The React-Person is a well-preferred JavaScript library for creating an interface, and this is an incredible option for creating a price app because it simply allows you to create a dynamic and interactive part.
In this article, we will go through the steps to produce a simple price-range app that uses React JS. As an alternative, we will focus on the plan and construction of the app so that you can see the method.
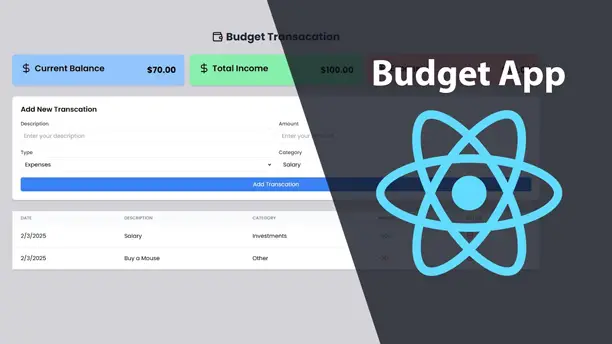
How to Make a Budget App in React JS
let’s see the tutorial that I made by creating a project in React JS, before moving the code, you must try to watch the tutorial that helps to learn each step from scratch. I hope the video tutorial is helpful for you.
I hope you’ve seen the complete tutorial and you’ve learned something new from this tutorial. Let’s see look at the source codes that are used to build a budget app in React JS.
You May Also Like:
- Make Responsive Website in React JS and Tailwind CSS
- Crud Operation in React JS
- Building a Responsive Admin Dashboard in React JS
- How to Build Weather App in React JS
- How to Make a Quiz App in React JS
First of All, you need to set your react project by using Vite. Once you set the project, then you can use the below codes inside the App.jsx file
import { Wallet } from "lucide-react";
import React from "react";
import Balance from "./components/Balance";
import TranscationForm from "./components/TranscationForm";
import TranscationList from "./components/TranscationList";
import { BudgetProvider } from "./context/BudgetContext";

function App() {
  return (
    <BudgetProvider>
      <div className="min-h-screen bg-zinc-300">
        <div className="container mx-auto px-4 py-8">
          <div className="flex items-center justify-center gap-2 mb-8">
            <Wallet size={32} className="text-blue" />
            <h1 className="text-3xl font-bold text-gray-800">
              Budget Transacation
            </h1>
          </div>
          <Balance />
          <TranscationForm />
          <TranscationList />
        </div>
      </div>
    </BudgetProvider>
  );
}

export default App;
After that, you must build many files and many other things that need to build a budget app. So, the next thing you need to build the Balance Component.
import { DollarSign } from "lucide-react";
import React from "react";
import { useBudget } from "../context/BudgetContext";

function Balance() {
  const { balance, income, expenses } = useBudget();

  return (
    <div className="grid grid-cols-1 md:grid-cols-3 gap-4 mb-8">
      <div className="bg-blue-300 p-6 rounded-lg shadow-md flex justify-between items-center">
        <div className="flex item-center gap-2 mb-2">
          <DollarSign size={32} className="text-gren-500" />
          <h2 className="text-2xl font-semibold">Current Balance</h2>
        </div>
        <p
          className={`text-2xl font-bold ${
            balance >= 0 ? "text-black-500" : "text-red-500"
          }`}
        >
          ${balance.toFixed(2)}
        </p>
      </div>

      <div className="bg-green-300 p-6 rounded-lg shadow-md flex justify-between items-center">
        <div className="flex item-center gap-2 mb-2">
          <DollarSign size={32} className="text-gren-500" />
          <h2 className="text-2xl font-semibold">Total Income</h2>
        </div>
        <p className="text-2xl font-bold">${income.toFixed(2)}</p>
      </div>

      <div className="bg-red-300 p-6 rounded-lg shadow-md flex justify-between items-center">
        <div className="flex item-center gap-2 mb-2">
          <DollarSign size={32} className="text-gren-500" />
          <h2 className="text-2xl font-semibold">Expenses</h2>
        </div>
        <p className="text-2xl font-bold">${expenses.toFixed(2)}</p>
      </div>
    </div>
  );
}

export default Balance;
After completing two steps we need to follow other steps as well, let’s look at the Transaction Form component codes.
import React, { useState } from "react";
import { useBudget } from "../context/BudgetContext";
import { fromJSON } from "postcss";

const categories = [
  "Salary",
  "Freelance",
  "Investments",
  "Food",
  "Transport",
  "Entertainment",
  "Bills",
  "Shopping",
  "Other",
];

export default function TranscationForm() {
  const { addTranscation } = useBudget();

  const [formData, setFormData] = useState({
    description: "",
    amount: "",
    type: "expenses",
    category: "other",
  });

  const handleSubmit = (e) => {
    e.preventDefault();

    if (!formData.description || !formData.amount) return;

    addTranscation({
      description: formData.description,
      amount: parseFloat(formData.amount),
      type: formData.type,
      category: formData.category,
    });

    setFormData({
      description: "",
      amount: "",
      type: "expenses",
      category: "other",
    });
  };

  return (
    <form
      className="bg-white p-6 rounded-lg shadow-md mb-8"
      onSubmit={handleSubmit}
    >
      <h2 className="text-xl font-semibold mb-4">Add New Transcation</h2>
      <div className="grid grid-cols-1 md:grid-cols-2 gap-4">
        <div>
          <label className="block text-sm font-medium text-gray-700 mb-1">
            Description
          </label>
          <input
            type="text"
            className="w-full p-2 border rounded-md focus:ring-blue-500 focus:border-blue-500"
            placeholder="Enter your description"
            value={formData.description}
            onChange={(e) =>
              setFormData({ ...formData, description: e.target.value })
            }
          />
        </div>

        <div>
          <label className="block text-sm font-medium text-gray-700 mb-1">
            Amount
          </label>
          <input
            type="number"
            className="w-full p-2 border rounded-md focus:ring-blue-500 focus:border-blue-500"
            placeholder="Enter your Amount"
            value={formData.amount}
            onChange={(e) =>
              setFormData({ ...formData, amount: e.target.value })
            }
          />
        </div>

        <div>
          <label className="block text-sm font-medium text-gray-700 mb-1">
            Type
          </label>
          <select
            className="w-full p-2 border rounded-md focus:ring-blue-500 focus:border-blue-500"
            value={formData.type}
            onChange={(e) => setFormData({ ...formData, type: e.target.value })}
          >
            <option value="expenses">Expenses</option>
            <option value="income">Income</option>
          </select>
        </div>

        <div>
          <label className="block text-sm font-medium text-gray-700 mb-1">
            Category
          </label>
          <select
            className="w-full p-2 border rounded-md focus:ring-blue-500 focus:border-blue-500"
            onChange={(e) =>
              setFormData({ ...formData, category: e.target.value })
            }
          >
            {categories.map((cat) => {
              return (
                <option value={cat} key={cat}>
                  {cat}
                </option>
              );
            })}
          </select>
        </div>
      </div>
      <button className="mt-4 w-full bg-blue-500 text-white py-2 px-4 rounded-md hover:bg-blue-600 flex items-center justify-center gap-2">
        Add Transcation
      </button>
    </form>
  );
}
The second last thing you need to add the is Transaction list component here is codes.
import { Trash2 } from "lucide-react";
import React from "react";
import { useBudget } from "../context/BudgetContext";

function TranscationList() {
  const { transcations, deleteTranscation } = useBudget();

  return (
    <div className="bg-white rounded-lg shadow-md">
      <div className="overflow-x-auto">
        <table className="w-full">
          <thead className="bg-gray-50">
            <tr>
              <th className="px-6 py-3 text-left text-xs font-medium text-gray-500 uppercase tracking-wide">
                Date
              </th>
              <th className="px-6 py-3 text-left text-xs font-medium text-gray-500 uppercase tracking-wide">
                Description
              </th>
              <th className="px-6 py-3 text-left text-xs font-medium text-gray-500 uppercase tracking-wide">
                Category
              </th>
              <th className="px-6 py-3 text-left text-xs font-medium text-gray-500 uppercase tracking-wide">
                Amount
              </th>
              <th className="px-6 py-3 text-left text-xs font-medium text-gray-500 uppercase tracking-wide">
                Action
              </th>
            </tr>
          </thead>

          <tbody className=" bg-white divide-y divide-gray-200">
            {transcations.map((transcation) => {
              return (
                <tr className="hover:bg-gray-50" key={transcation.id}>
                  <td className="px-6 py-4 whitespace-nowrap">
                    {new Date(transcation.date).toLocaleDateString()}
                  </td>
                  <td className="px-6 py-4 whitespace-nowrap">
                    {transcation.description}
                  </td>
                  <td className="px-6 py-4 whitespace-nowrap">
                    {transcation.category}
                  </td>
                  <td
                    className={`px-6 py-4 whitespace-nowrap ${
                      transcation.type === "expenses"
                        ? "text-red-500"
                        : "text-green-500"
                    }`}
                  >
                    {transcation.type === "income" ? "+" : "-"}
                    {transcation.amount}
                  </td>
                  <td className="px-6 py-4 whitespace-nowrap">
                    <button
                      className="text-red-500 hover:text-red-700"
                      onClick={() => deleteTranscation(transcation.id)}
                    >
                      <Trash2 />
                    </button>
                  </td>
                </tr>
              );
            })}
          </tbody>
        </table>
      </div>
    </div>
  );
}

export default TranscationList;
The last thing you need to grab all the content in the Context API component let’s see the codes below.
import { InfoIcon } from "lucide-react";
import { createContext, useContext, useEffect, useReducer } from "react";

const BudgetContext = createContext();

const loadInitialState = () => {
  const savedTranscation = localStorage.getItem("budget_transcations");
  return {
    transcations: savedTranscation ? JSON.parse(savedTranscation) : [],
  };
};

const intialState = loadInitialState();

function bugetReducer(state, action) {
  switch (action.type) {
    case "ADD_TRANSCATION":
      return {
        ...state,
        transcations: [...state.transcations, action.payload],
      };
    case "DELETE_TRANSCATION":
      return {
        ...state,
        transcations: state.transcations.filter(
          (transcation) => transcation.id !== action.payload
        ),
      };
    default:
      return state;
  }
}

export function BudgetProvider({ children }) {
  const [state, dispatch] = useReducer(bugetReducer, intialState);

  useEffect(() => {
    localStorage.setItem(
      "budget_transcations",
      JSON.stringify(state.transcations)
    );
  }, [state.transcations]);

  // Add transcation
  const addTranscation = (transcation) => {
    dispatch({
      type: "ADD_TRANSCATION",
      payload: {
        ...transcation,
        id: crypto.randomUUID(),
        date: new Date().toISOString(),
      },
    });
  };

  // Delete transcation
  const deleteTranscation = (id) => {
    dispatch({
      type: "DELETE_TRANSCATION",
      payload: id,
    });
  };

  //const balance
  const balance = state.transcations.reduce((acc, transcation) => {
    return transcation.type === "income"
      ? acc + transcation.amount
      : acc - transcation.amount;
  }, 0);

  // income
  const income = state.transcations.reduce((acc, transcation) => {
    return transcation.type === "income" ? acc + transcation.amount : acc;
  }, 0);

  // expenses
  const expenses = state.transcations
    .filter((t) => t.type === "expenses")
    .reduce((acc, curr) => acc + curr.amount, 0);

  return (
    <BudgetContext.Provider
      value={{
        transcations: state.transcations,
        addTranscation,
        deleteTranscation,
        balance,
        income,
        expenses,
      }}
    >
      {children}
    </BudgetContext.Provider>
  );
}

export function useBudget() {
  const context = useContext(BudgetContext);
  if (context === undefined) {
    throw new Error("useBudget must be used within a BudgetProvider");
  }
  return context;
}
Step 1: Understand the purpose of your budget app
Before you start structure, it is important to emphasize what your price limit will do. A basic value-app app often helps customers inspect the revenues and bills, and they find out how much money they have given up. Remember the options you want to squeeze in. For example:
- Including revenues and bills.
- Classification of transactions (eg rent, rent, holidays).
- Shows an essence of total income, bills, and stability.
- To allow customers to edit or remove transactions.
- When you receive a transparent concept of options, you will be able to move to plan the structure of your app.
Step 2: Plan format and parts
In response, the structural parts of each small thing are used. An element is like a construction block that represents that part of the personal interface. For the price range -you will be able to divide the app into small parts. As you probably want to build it, it’s an example of:
- Header item: This can show the title of the app, such as “My Budget Tracker.”
- Stability element: It reveals the current stability (earns minus the bill) of the person.
- Revenue and expenses essence: It reflects individual total income and full bills.
- Transactions -DEEN checklist: This reveals a list of all transactions (income and bills) that the person has added.
- Add as a transaction: This is the place where customers can enter new revenues or bills, along with details such as quantity, square, and outline.
By dividing the app into small parts, you will be able to work in person on each half, after which mixed them to create a total app.
Step 3: Assume Concerning the Knowledge
Your price range app might want to retail and handle knowledge, such as the checklist of transactions and quantities. In React, you should utilize the state to maintain observation of this knowledge. The state is sort of a reminiscence to your app—it holds info that may change over time.
For instance:
- You’ll want a state to retail the checklist of transactions.
- One other state can observe the overall earnings, whole bills, and steadiness.
You’ll additionally determine how customers will enter knowledge. As an illustration, when a person provides a brand new transaction, the app ought to replace the state to incorporate that transaction and recalculate the totals.
Step 4: Design the Person Interface
The personal interface (UI) is how customers work together along with your app. Hold it easy and straightforward to make use of. Listed below are some ideas:
- Use clear labels for entering fields, like “Quantity,” “Class,” and “Description.”
- Show the transaction checklist in a clear and arranged approach, comparable to a desk or an inventory with clear headings.
- Use colors to distinguish between earnings (e.g., inexperienced) and bills (e.g., crimson).
- Be certain the steadiness and abstract sections are simple to learn and stand out.
- You don’t have to make it fancy—give attention to performance first, and you may all the time enhance the design later.
Step 5: Add Interactivity
A price range app wants to answer a person’s actions. For instance:
When a person provides a brand new transaction, the app ought to replace the transaction checklist and recalculate the totals. If a person edits or deletes a transaction, the app ought to mirror these modifications instantly.
In React, you’ll be able to obtain this through the use of occasion handlers. These are features that run when a person performs a motion, like clicking a button or submitting a type. For instance, when a person submits the “Add Transaction” type, an occasion handler can take the entered knowledge, replace the state, and show the brand-new transaction within the checklist.
Step 6: Check and Enhance
When you’ve constructed the essential model of your app, it’s time to check it. Strive to include completely different transactions, modify them, and delete them to verify every little thing works as anticipated. Ask associates or households to attempt it out and provide you with suggestions.
You would possibly uncover areas the place the app might be improved, comparable to:
- Including validation to stop customers from coming into invalid knowledge (e.g., damaging quantities).
- Together with extra classes or customization choices.
- Enhancing the design to make it extra visually interesting.
Step 7: Deploy Your App
After testing and refining your app, you’ll be able to share it with others by deploying it online. There are numerous platforms the place you’ll be able to host your React app without cost, comparable to Vercel or Netlify. As soon as deployed, you’ll be able to share the hyperlink with associates and even use the app yourself to handle your price range!
Conclusion
building a budget app in React JS is an effective way to follow your expertise whereas creating one thing is helpful. By breaking the app into parts, managing knowledge with state, and specializing in person interplay, you’ll be able to create a practical and user-friendly price range tracker.
Bear in mind to begin easy, check usually, and regularly add extra options as you change into extra snug with React. Glad coding!


