
Hey everybody, I hope you are fine, today I will share with you How to Make a Quiz App in React JS from scratch. The largest websites providing you the test inside the test have Questions and Answers. So, if you want to get to the next level of your skills, you need to Pass the test, It’s an application namely Quiz Application.
Making a quiz app in React.js is an effective way to observe your React expertise and construct attractive, interactive software. Earlier than writing any code, it is important to plan your app. Decide what options you need your quiz app to have.
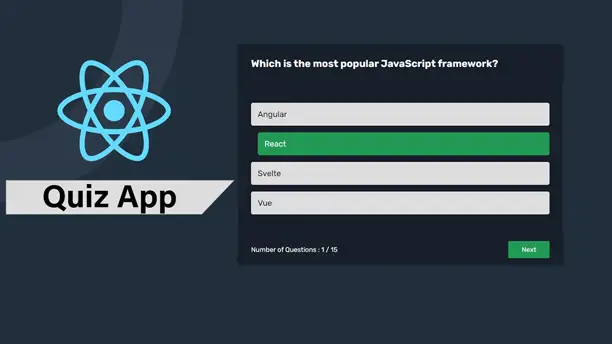
Usually, a quiz app features a beginning display screen the place where customers can start the quiz, multiple-choice questions, a technique to maintain monitor of the consumer’s rating, suggestions on whether or not the consumer’s solutions are appropriate or incorrect, and a closing display screen displaying the consumer’s complete rating.
To begin, you might want to arrange your growth atmosphere. Set up Node.js and npm (Node Bundle Supervisor) if you have not already. These instruments will help you create and handle your React undertaking.
How to Make a Quiz App in React JS
Before moving on to the codes, you should watch the tutorial. However tutorial is the best way to understand each thing from scratch. So, I made it for you, you can watch it till to end and make your own Quiz App in React JS on your personal computer, using the same tactics that are used inside the video.
I hope you’ve watched the video and learned many new things from this tutorial, If you face any problems during the video you can see the codes on below.
You May Also Like:
- How to Make Form Validation in React JS
- Create a Multi-Step Form in React JS
- Create a Login And Signup Page in React Js
- How to Create Todo App in React JS
- How to Create a Modal Popup in React JS
- How to Make An Accordion in React JS
With Node.js and npm put in, you may create a brand new React undertaking utilizing Create React App, an instrument that units up a brand new React undertaking with a default build and configuration. Open your terminal and run the command to create a brand-new undertaking. As soon as the undertaking is created, navigate into the undertaking listing.
A well-structured undertaking is essential to sustaining and scaling your app. In your React undertaking, you may have a src listing the place where most of your code will reside. Arrange your code by creating subdirectories for elements, properties, and utilities. For a quiz app, you may create elements like StartScreen, Query, Rating, and ResultScreen.
import React, { useEffect, useReducer } from "react";
import { quizQuestions } from "../questions";
import StartScreen from "./components/StartScreen";
import QuizStart from "./components/QuizStart";
import FinishScreen from "./components/FinishScreen";

function reducer(state, action) {
  switch (action.type) {
    case "data-received":
      return { ...state, questions: action.payload, status: "ready" };
    case "active":
      return { ...state, status: "active" };
    case "newAnswer":
      const question = state.questions.at(state.index);

      return {
        ...state,
        answer: action.payload,
        points:
          action.payload === question.correctOption
            ? state.points + question.points
            : state.points,
      };

    case "nextQuestions":
      return { ...state, index: state.index + 1, answer: null };
    case "finishScreen":
      return { ...state, status: "finish" };
    case "restart":
      return { ...state, status: "ready", index: 0, answer: null };
  }
}

const initialstates = {
  questions: [],
  status: "loading",
  index: 0,
  answer: null,
  points: 0,
};

function App() {
  const [{ status, questions, index, answer, points }, dispatch] = useReducer(
    reducer,
    initialstates,
  );

  useEffect(function () {
    if (quizQuestions) {
      dispatch({ type: "data-received", payload: quizQuestions });
    }
  }, []);

  const totalQuestions = questions.length;
  const maxPossiblePoints = questions.reduce(
    (prev, cur) => prev + cur.points,
    0,
  );

  return (
    <main className="container">
      {status === "ready" && (
        <StartScreen
          dispatch={dispatch}
          totalQuestions={totalQuestions}
          maxPossiblePoints={maxPossiblePoints}
        />
      )}
      {status === "active" && (
        <QuizStart
          questions={questions[index]}
          dispatch={dispatch}
          totalQuestions={totalQuestions}
          index={index + 1}
          answer={answer}
        />
      )}
      {status === "finish" && (
        <FinishScreen
          dispatch={dispatch}
          points={points}
          maxPossiblePoints={maxPossiblePoints}
        />
      )}
    </main>
  );
}

export default App;
It’s App.jsx file I used the useReduce hook to handle the states, I mentioned all codes inside it, but you can separate it as want. The next thing you need to make StartScreen Components.
import React from "react";

function StartScreen({ dispatch, totalQuestions, maxPossiblePoints }) {
  return (
    <div className="quiz_wrapper">
      <h3>Welcome to the</h3>
      <h2>Programming Quiz</h2>
      <p>Number of Questions : {totalQuestions}</p>
      <p>Total Points : {maxPossiblePoints}</p>
      <button className="btn" onClick={() => dispatch({ type: "active" })}>
        Let's Start
      </button>
    </div>
  );
}

export default StartScreen;
Once you have done that, then you need to display the question when the user clicks on the button, Let’s look at the QuizStart Codes that are used to display the Questions and Answers.
import React from "react";
import FooterContent from "./FooterContent";

function QuizStart({ dispatch, questions, totalQuestions, index, answer }) {
  const hasAnswer = answer !== null;

  return (
    <div className="quiz">
      <div className="quiz_header">
        <h2>{questions.question}</h2>
      </div>
      <div className="quiz_body">
        {questions.options.map((option, index) => (
          <li
            key={option}
            onClick={() => dispatch({ type: "newAnswer", payload: index })}
            className={`${
              hasAnswer
                ? index === questions.correctOption
                  ? "correct"
                  : "wrong"
                : ""
            }`}
          >
            {option}
          </li>
        ))}
      </div>
      <div className="quiz_footer">
        <p>
          Number of Questions : {index} / {totalQuestions}
        </p>
        <FooterContent
          dispatch={dispatch}
          index={index}
          totalQuestions={totalQuestions}
        />
      </div>
    </div>
  );
}

export default QuizStart;
The last thing you need to add the final components to display the results and restart button, So, you need to use below mentioned codes.
import React from "react";

function FinishScreen({ dispatch, points, maxPossiblePoints }) {
  return (
    <div className="finish_screen">
      <p>
        Your Score is : {points} / {maxPossiblePoints}
      </p>
      <button className="btn" onClick={() => dispatch({ type: "restart" })}>
        Restart
      </button>
    </div>
  );
}

export default FinishScreen;
The beginning display screen is the very first thing customers will see. It ought to embrace a title, a short description of the quiz, and a button to begin the quiz. This part will deal with the preliminary state of your app and transition to the quiz when the consumer clicks the beginning button.
The query part is the center of your quiz app. It should show the query, multiple-choice solutions, and supply suggestions primarily based on the consumer’s choice. To handle state, use React’s useState hook to maintain a monitor of the present query and the consumer’s reply.
Because the consumer progresses by way of the quiz, you may have to handle the state to maintain a monitor of the present query, the consumer’s rating, and whether or not the quiz is completed.
Use React’s useState and useEffect hooks to handle this state. Implement logic to navigate between questions and present the ultimate rating when the quiz is full.
After the consumer solutions all of the questions, present a rating display screen that shows the entire variety of appropriate solutions. This part also needs to present suggestions and probably a button to restart the quiz.
Suggestions are a vital part of consumer expertise. After every query, inform the consumer whether or not their reply was appropriate or incorrect. These instant suggestions help keep the consumer engaged and studying.
Styling is crucial to make your app visually interesting. Use CSS or CSS-in-JS resolution-like styled components to fashion your elements. Guarantee your app is responsive and works properly on completely different gadgets and display screen sizes.
Testing ensures your app works as anticipated. Write checks in your elements utilizing a testing library like Jest and React Testing Library. Give attention to testing the performance, akin to navigating by way of questions, scoring, and displaying suggestions.
Efficiency is essential for superb consumer expertise. Optimize your React app by lazy loading elements, minimizing re-renders, and utilizing React’s useMemo and use callback hooks to forestall pointless computations.
Deploying Your App
As soon as your app is full and examined, it is time to deploy it. You should utilize providers like Vercel, Netlify, or GitHub Pages to host your app. These platforms present easy-to-use interfaces for deploying React purposes. but I’m to use Hostinger hosting or a server to upload the react JS Project.
Conclusion
Building a quiz app in React.js includes several steps, from planning and organizing your growth atmosphere to deploying your app. By breaking down the method and specializing in key ideas, you may create a strong and interactive quiz app. Glad coding!


